Homeopathy & The Wet Dose Method
+How to easily give homeopathy to anyone, including pets, animals, plants, babies & incapacitated people
I already covered quite a bit about wet dosing here, including FAQs about homeopathy such as radiation fears, coffee use and much more. So if you missed it, go back and check out that article.
For those of you who are new to Homeopathy Rising, welcome! and you can find the full archive here.
This article will expand upon the topic of wet dosing with homeopathy. Which is the method I use for myself, my family, my pets, and with all my clients who choose it. (Most do because the cost savings is substantial.)
But before we get to the step-by-step guide for to how to make your own homeopathy wet doses, let’s cover a very common, and related, question:
How do I give homeopathy to cats, and dogs and all types of pets and animals?
It’s as easy as this:
You can tell my cat has had a lot of homeopathy wet doses before! The first few times you may have to hold them more firmly, but once they realize it’s just sweet water, they really don’t mind.
Notice how my hand is under his whiskers. The biggest thing that will make animals pull away is if you are messing with their whiskers.
Tip: Rinse the tip of the dropper after each dose to keep the bottle fresh; IF it makes contact with the mouth. (YOU can just drop it in your mouth without touching the dropper, so no rinse required.)
Usually it is best not to go at the animal from the front, better from behind or the side. And you can tilt their chin up a bit to help open the mouth, at least at first. (Don’t try to surprise them, I usually ask permission gently and they will stop, let me give them a dose, and then carry on.)
However, some claim their animals won’t accept homeopathy this way. So, yes, you can put it in their water bowl. One of my cats will not touch their water if there is any homeopathy in it. (The one in the video above. How does he know?) The other is very happy to drink it out of her bowl.
If adding homeopathy to a water bowl, I make up a wet dose bottle (see below) and put a dropper of that in the water dish each time I clean and refill it.
(I used to put a couple of homeopathy pills in the water bowl, but a squirt of the wet dose definitely acts, and also uses a lot fewer pills, since I change the water nearly every day.)
Tip- Put out two bowls of water, even for one animal. One with homeopathy and one without, so they can choose. Pet owners report, for example, that their dogs will drink from both, perfectly selecting the homeopathy bowl a couple of times a day, and the plain water the rest of the time.
Other ways to give homeopathy to animals, babies and people who can’t participate:
Spray it. If I had a wild stallion I was trying to get to calm down, I would spray their nose and face with a mist of homeopathy in wet dose form. (Or hose them down with it!)
Sniff it. There are reports of animals calming down after just a whiff off of an open homeopathy tube. (Samuel Hahnemann, the founder of homeopathy, used inhaling the dry remedy as a method for more gentle dosing of sensitive patients.)
Apply it to wrists, inside ears, or other parts. Optimal is probably contact with mucous membranes, but I’ve heard plenty of reports of these other methods acting.
Bonus— Not that this is in any way easier as a general practice, but wet doses of homeopathy in the eyes can be a great way to treat eye issues.
Aconitum is sometimes referred to as ‘Arnica for the eye’. Multiple times my husband’s eyes have become very irritated from working around dusty or gritty materials, and just one drop of Aconitum 200 in wet dose, directly in the eye(s), completely took care of it. (This could be repeated, but so far we have never had to give him more than one drop!)
Wet doses can also be used to apply homeopathy to the skin. For instance Joe De Livera has a method for male pattern baldness where Arnica is applied to the scalp. (He uses olive oil, but I would use the wet dose method!) I also use certain remedies on wounds and skin issues in low potencies. A wet dose spray, or simply drops patted on the skin, works wonderfully for these applications. (Yes, I’ll share more on this soon.)
Your Step-by-Step Guide to Making a Wet Dose of Homeopathy:
(Again, to revisit the WHY of wet dosing— easy, effective, and much more affordable when doing repeated doses as per the Banerji Protocols— check out this article.)
First, choose your bottles. I use either one or two ounce dropper bottles. Some people like to use spray bottles. (3-5 spritzes in the mouth, instead of a dropper.) Some use mason jars and take a sip or spoonful per dose. Other bottles have a cap that makes a nice little cup. You can also use a syringe in place of a dropper.
In my early days I would run out of bottles when dealing with emergencies for my cat and would just dissolve the homeopathy pillules in a little glass or jar of water and use a loose dropper or syringe to administer by mouth.
If you do sip out of the container, keep in mind backwash could contaminate the mix and make it not last as long. (Not so much an issue in acute situations, where the person maybe keeps sipping often and uses it all up. I’m talking for long term chronic dosing where it’s best to keep the mixes from going bad so you don’t have to remake them! More on this below.)
Yes, you may use larger bottles, but then also gradually use more pills. I would take this up to 10 pills in 500mL, which is Joe De Livera’s ‘recipe’. Although I have seen just 5 pills in a liter of water act. (I was helping my father from afar, so we set him up via phone, using 5 pills of each remedy all in one container. He kept it in the fridge and took a sip twice a day. When I visited some months later, I discovered the container he was using was a full one liter jug! But the remedies clearly were helping him even at this proportion of pills to water.)
The basics of making a homeopathic wet dose:
I use 3 of the No 6 size homeopathy pillules in up to two ounces of water.
(This is the standard size homeopathy pill, such as is in the Boiron tubes.)
I use 4-5 of the No 3 poppy-size homeopathy pills.
When it doubt just use one dose of the homeopathic remedy as per the manufacturer’s guidelines.
However, I do find the above recommendation of 3 pills works for pretty much any manufacturer, and is an easy-to-remember guideline. (If you are doubting, put more pills rather than fewer.)
Shown below is a one ounce and a two ounce dropper bottle side by side—
Three pills, ready to go (No 6 size from Boiron)—
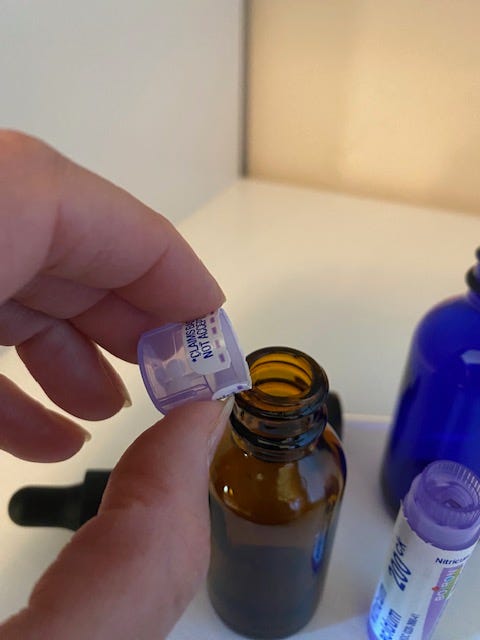
The pills go in the bottle—
Then just add water and wait for the pills to dissolve. (This will take 1-10 minutes approximately, depending on the size and type of the pills and the temperature of the water.)
Use the purest water you have. I use reverse osmosis water. If I was in an emergency somewhere out in the world, I would use whatever I could get my hands on.
Then a dose is just a dropper squirted in the mouth.
(Just like the cat in the video above.)
For example, your Banerji Protocol might call for twice a day dosing, so you take a squirt in the morning, and one at night.
It can go under the tongue or on the mucous membranes, in a relatively clean mouth.
This equals about 1/4 teaspoon, per dose. You can take more, but it’s not necessary.
As explained in the last article about this, a dose is a dose— whether you take one pill or the whole bottle, or one squirt or the whole ounce.
Putting one dry dose in the water makes the water one whole equal dose, no matter how it is partitioned.
So, this is all that’s needed for a dose—
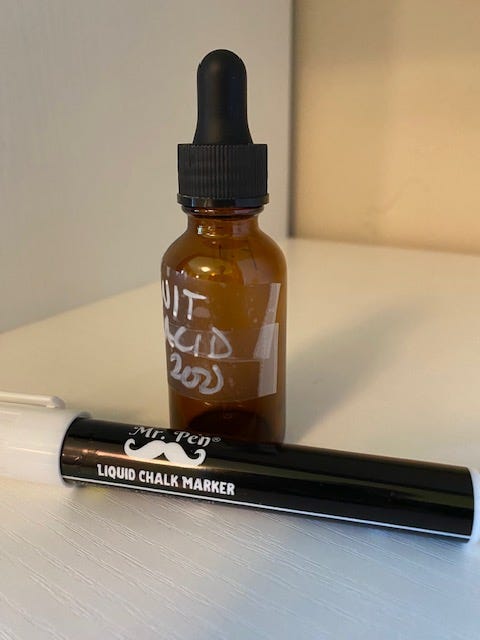
I then label the glass bottles with a liquid chalk marker. Often I just leave it at that.
When giving the bottles to others I may write the frequency or other abbreviated notes for them.
And if I’m going to give it to someone, or travel with it, I put scotch tape over the chalk marker, which keeps it from coming off (even when exposed to water). I prefer the tape because it is fast and easy, and I can customize it, and by leaving a little tab on the end it is VERY easy to remove. (It’s also cheap.)
I know many people who use labels and label makers. But I have yet to find one that doesn’t end up with me spending precious time removing sticky residue from bottles, which is something I have no time or patience for.
I also have clients who get different colored bottles for different people in the household. You can get as creative as you like! The two ounce bottles clearly last longer when taking a remedy twice a day. But for remedies that are only taken once a week, for example, a one ounce bottle will last a long time.
How I label the bottles, nothing fancy but it works!—
Super easy to peel off, and the liquid chalk marker wipes clean with only water—
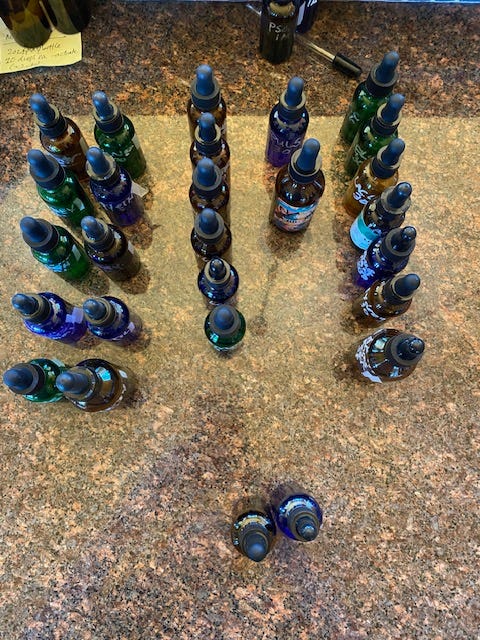
Then I line the bottles up, organized by person or pet, and frequency (once a day, twice a day, every other day etc).
Now the doses are ready and can be taken back to back. As I tell my clients, once you set up the bottles, it shouldn’t take more than about 2 minutes per day to take the doses.
Sure, you MAY space them out, if you prefer, but it is not necessary. (Having to wait 15 minutes between doses can be onerous, and throughout years of testing various approaches I have not been able to determine any benefit to this.)
When taken twice a day, a one ounce bottle will last about two weeks, and a two ounce bottle about a month.
(I do often combine more than one remedy in a bottle, for ease. But more on that another day.)
My countertop—
Storing Homeopathic Wet Doses:
Here in Colorado my homeopathy wet doses live on the counter, as shown above.
I do avoid direct sunlight or excessive heat. Most of the remedies have sugar in the pills and, especially in certain climates, they can go bad or get funky.
I have had it happen a few times here, where a bottle developed brown stringy stuff in it, or the flavor got tangy and fermented. And I do find some remedies are more prone to getting slimy than others.
For instance, Chamomilla gets a little slippery-feeling after a couple of months, whereas Lachesis seems to last forever. (Flower versus venom?) But even after leaving most bottles on the counter for a year or longer, I usually see only a little cloudiness, and they taste fine and still act.
However, I have clients in other climates, particularly the Southeastern states (Florida to North Carolina, extending to Eastern Texas), where wet doses going bad is an issue.
The number one solution is to keep them refrigerated. (Put the remedies in a container you can easily maneuver around.)
You can also put a little alcohol in the bottles. Everclear (grain alcohol) is a good option. Others use pure vodka, brandy, or even tequila. I put 3 drops of Everclear in bottles I want to last a long time; for instance in the Chamomilla 200 that lives on my husband’s nightstand for the rare nights he has trouble sleeping.
(In the Southeastern US, some people report having to put MORE than a few drops of alcohol.)
You can also buy the homeopathic medicines from the pharmacy made in alcohol, or water. But this is not an option for every remedy, or manufacturer, and most people prefer the ease of buying and storing the standard options.
Cleaning Wet Dose Homeopathy Bottles:
Yes, you can reuse the bottles!
If refilling with the SAME remedy/remedies, I just rinse thoroughly and check that it’s not slimy or off in any way. Then I make up a fresh wet dose in the same bottle.
[Note: I fill the empties with water and pour the residue over any potted plants that need some help. My struggling plants that become a homeopathy dumping ground invariably turn around beautifully. More on targeted homeopathy for plants another day, but even the random approach serves them well!]
If wanting to clean out bottles to use with different remedies, here’s what I do: Rinse or wash them out with just water and maybe a drop of soap, depending on how they look and feel. I then put a little hydrogen peroxide in the bottles with some water, filling the dropper with this (to clean the tips). I usually let them sit in the sink like this for maybe half a day. Then I rinse thoroughly and the bottles go in the dishwasher for the next time I run it. Bottles on the top shelf with the glassware, upside down on a prong, and the droppers all in one silverware cubby together. After running the load, I rinse them out and set them to dry. (Tip— Once mostly dry, flip them face up to let the remaining moisture escape.) I usually leave them all taken apart and drying for a day or so before putting them away.
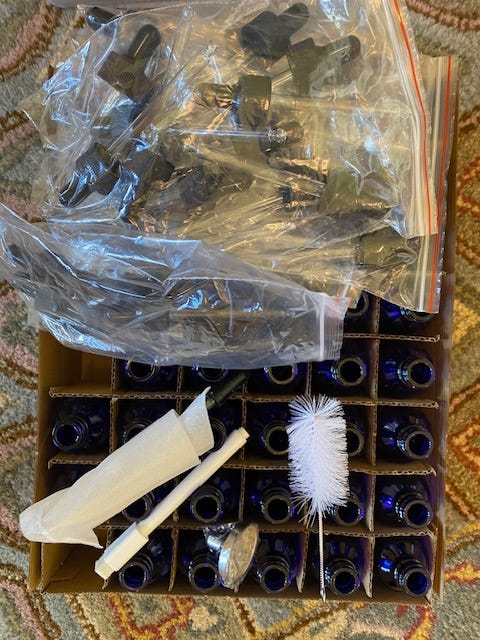
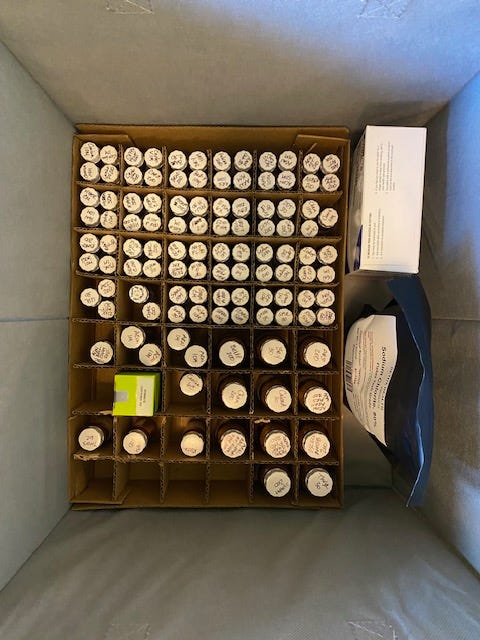
Bottle brushes? A bottle brush made for straws works well for the droppers themselves. I have only found the right size bottle brush for the small bottles in one place, as part of this kit. (I love this kit, and the cardboard cubbies serve as excellent bonus homeopathy storage. Just put a little packing tape around the corners after removing the dropper bottles.)
I also know people who boil the bottles in order to reuse them. Yes, the tops can be boiled as well.
Succussing the Wet Dose Bottles?
Nope. With Practical Homeopathy and the Banerji Protocols we are choosing specific potencies for a reason and we want to know we are getting that potency every time.
Traveling with Wet Dose Homeopathy?
No problem. You can take the full one or two ounce bottles in your carry-on in a quart-sized ziploc bag. I have not been stopped or questioned at all. Yes, the wet dose bottles went through the X-ray machine and still acted. (See my myth-busting on this topic here.)
True, carrying the liquid doses is a little heavier. But I managed just fine. You may also travel with dry doses if you prefer. I bring my emergency kit with dry dose pills, along with some extra empty dropper bottles, in case I need to make up a wet dose while on the go.
And there we are!
Questions about making homeopathy into wet doses? Paid subscribers can ask specific questions below, and I do answer!
You can also find me on over on X.com @HomeopathyNews where I share lots of little tips and quotes and links to homeopathy research articles.
Thank you for reading and subscribing! Until next time…
As always, use common sense and practice homeopathy within your skill level. If you need help, particularly emergency, medical or otherwise, do get it, please. Remember that with many chronic conditions, patience and persistence are an important part of the healing process. I can’t make claims or promises, but that’s okay because Homeopathy can speak for itself. :)




Hi Emily, Thank you so much for your substack! Great information! I was wondering if using distilled water from a plastic jug would be a good option as a pure water source for wet dosing? Thank you!
Excellent. Hopefully, if I have questions I can ask on the comment sections since I don't use X.